If you’re advertising for an online store, you might want to consider adding a Shop tab to the Section on your Facebook page. In this guide, you’ll learn the steps to set up a Facebook shop.

What exactly is Facebook’s “Shop” feature, and why should your page have one? Customers can “shop” at your store without ever leaving Facebook in a dedicated “store section.”
Adding a Shop area to your Facebook Page is a terrific way to showcase your products, engage with consumers through the “message” button, and sell to Facebook users. However, you must be a US-based firm to sell via your shop area at this time.
Adding a Shopping Section on Your Facebook Page!
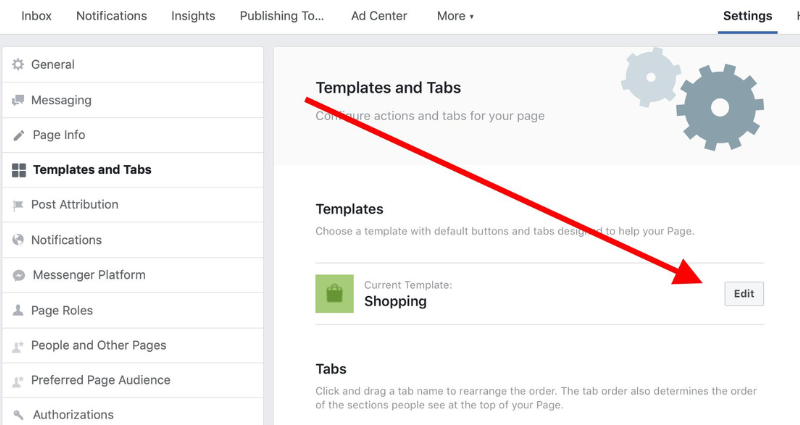
To set up a shopping cart, go to your page’s settings, select “Template and Tabs,” and then use the “Add a Tab” button.
Navigate to the “shop” tab and click the “add” button.
It can be found on the page’s left-hand side upon clicking. Click the new Shop tab and select the checkbox labeled “I agree to the seller’s terms and policies” from the resulting pop-up window.
There are significant customer support policies and delivery, return, and dispute policies that you must adhere to, so be sure to review them.
Next, select the payment method and currency.
Adding Products to the Facebook Shop on Your Page
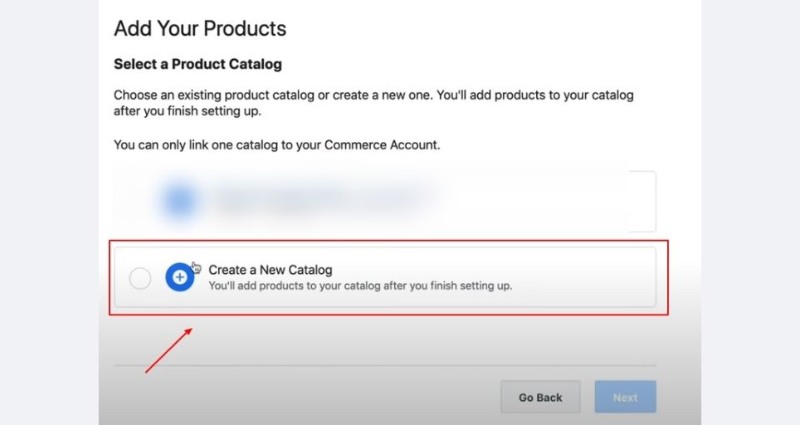
Adding products to your Facebook e-shop is a simple and basic process.
- Name: Enter your product’s name.
- Price: Include the cost. Use the “This product is on sale” option to notify customers of any discounts.
- Description: Include a brief explanation.
- Share this item on your website: This option may be appropriate if you are launching a new product or service.
- Inventory: If relevant, use this field to indicate the current state of your product.
- Edit inventory option: Here, you can enter various sizes, colors, etc. for your products, as well as their prices and inventory information.
- Delete Product: Using this option, you can remove a product from your store. You may alter the product photo to make it more visually appealing by hovering over the image and hitting the “brush” icon.
Here, you can apply filters and stickers and crop the shot to suit your preferences.
When you’re finished, hit the “Save” button.
Each product you add must be processed, although this will only take a few moments. You will be notified when it is complete and accessible to the public. If you have an excessive number of products to add manually and a third-party website like Shopify, you can automate this process by configuring the integration.
After completion, take care to test your shop. To do so, hover over the button on your page (Shop Now) and select the test option. This option provides a glimpse of what your prospective clients will see. You will also see a summary of the number of views and messages sent for the product in question.
If you wish to delete your shop, you may do so easily by following the instructions below:
- Select the Shop option
- Select Delete Shop from the drop-down menu.
- Click the Delete Shop button.
Keep in mind that you won’t be prompted to double-check your selection, so you shouldn’t delete it by accident.
Categorize Your Items Into Collections
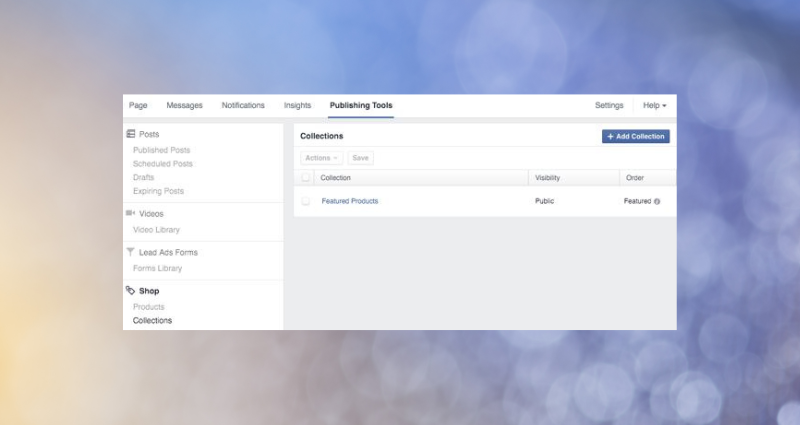
After you have uploaded your products to your e-commerce site, you may organize them using collections. Collections are a terrific way to organize your products and make it easier for buyers to find what they need. The “Featured Products” collection is generated by default.
To build a collection, one must
- Navigate to the Shop area of your page.
- Click the gear icon.
- Select “Manage Store.”
- Select “Collections” from the menu.
- Press “Add to Collection”
- Provide a name and select visibility.
- Pick out some new additions to your collection.
- Just hit the “Save” button.
When publishing a Facebook post to your page’s timeline, you have the option to add product tags to photos and videos. This helps children identify the things on display.
How to Access Your Facebook Shop’s Insights?
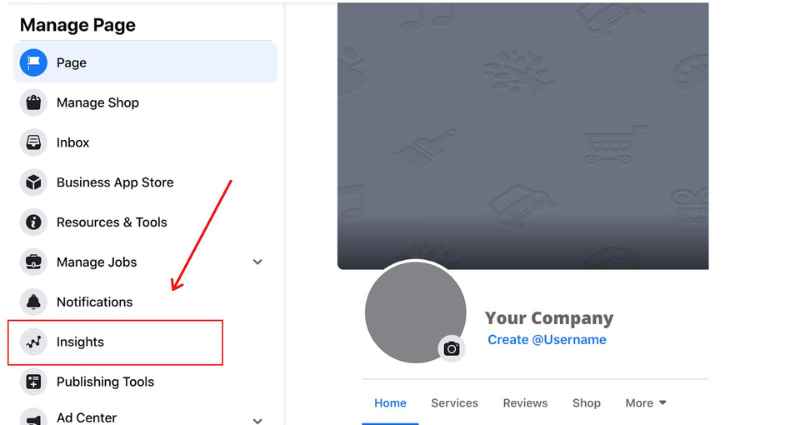
Once people begin visiting your shop and interacting with things, the Products section will provide you with vital information about them. To access the wisdom:
- Select publishing tools from the page’s menu bar.
- Select the Shop tab from the left-hand menu.
- Product Selection
Promoting Your Facebook Shop Section!
Now that the shop has been established, it is time to raise awareness and attract customers. You can encourage potential clients to visit your business in the following ways:
- Include the link in a Facebook post.
- Navigate to the Store Section on Your Facebook Page.
- Select the gear icon.
- Click the “Copy Direct Link” button.
Provide this Link to your web store visitors.
Tag your shop’s products in your Facebook organic posts.
When publishing a Facebook post to your page’s timeline, you have the option to add product tags to photos and videos. This helps users identify the listed products, making your message more relevant to them and boosting engagement.
To tag an image, you must:
- open your post and hover over the image;
- Select the “Tag Products” button.
- Select the item you wish to tag and begin typing the item’s name.
- Click “Done Tagging” after you’re done.
I work at Likes Geek as a marketing researcher and journalist with over 5 years of experience in media and content marketing. With a demonstrated history of working in the international news and financial technology publishing industries. I manage content and the editorial team at Likes Geek.


